My Othermill Pro is great for rapid prototyping of PCBs, plastic or metal parts. The speed of the spindle makes low-load applications like PCB cutting extremely quick, which is great. Unfortunately, the 26,000 RPM the spindle rotates at results in a pretty loud noise when a tool is cutting.
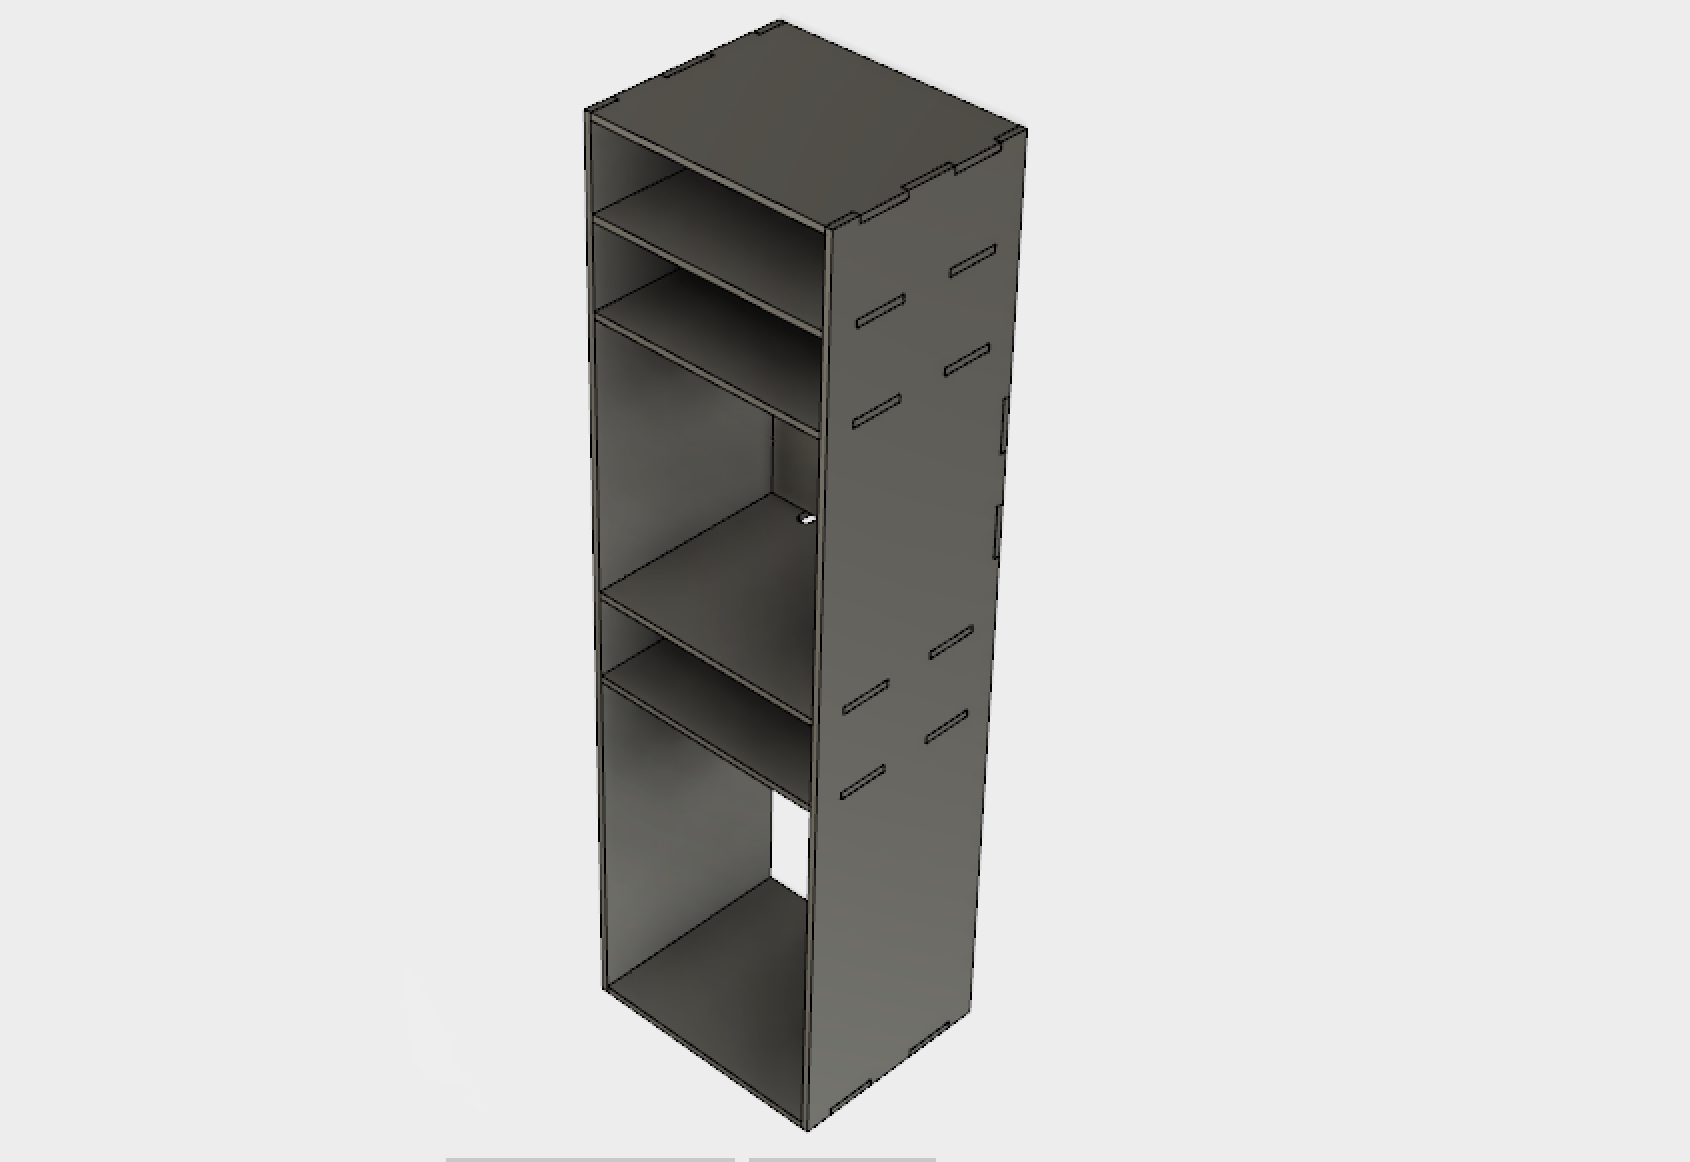
Due to this, I’ve been thinking for awhile about ways to dampen the sound of the machine while it’s operating while also improving the infrastructure that surrounds the machine by taking advantage of vertical space. Enter the CNC Mill Enclosure, a big plywood box that houses the Othermill, some space for plastic Sterilite bins (which I use for stock and project storage, among other things), and a big space underneath for some drawers.
My work volunteering at Jacobs Hall offers me access to a 4x8 ShopBot router, which is fantastic for cutting plywood. I knew I’d be purchasing the plywood through Jacobs, but hadn’t picked out a sheet prior and therefore didn’t know the final thickness. Since I intended on using some close-fit joints from the start, the sheet thickness was important, so I included it as a parameter in Fusion360 as I worked on the model, along with some others that I could quickly adjust on the fly.
For the mill to access all corners of the inside holes, and so the pieces could fit together at all, I added dogbones everywhere with diameter 0.005" larger than the diameter of the cutting tool (this is why I also included "ToolDiameter" as a parameter). The male plugs that fit the dogbone-shaped holes received a bit of a chamfer to aid in assembly, as well. The 0.01" gap between hole size and plywood thickness worked out well: it wasn’t a press fit, but a close fit that located the parts well and didn't require a ton of hammering on my end.
Instead of modeling all the panel pieces individually and assembling them later, I extruded each panel as a separate body in one large part file. This ended up working pretty well for the modeling portion. Unfortunately, when it came time to do the CAM, I had to rotate, align and move all the individual panels to fit them into the stock area.
The milling went smoothly and took about an hour overall with a single ¼” flat endmill. In order to prevent the pieces from flying out after they were cut out, I used the (fantastic) tabbing feature that’s built into Fusion360. It was super easy to use in software and removing the pieces only too a few minutes with a chisel once the cutting was done.
Quick side note: I’d never used plastic brad nails as a fixturing method on a sheet router before but WOW, what an awesome method. You don’t have to worry about the tool milling through any metal nails or screws and they’re fast to remove from leftover stock with a quick snip.
After a bit of sanding, assembly went pretty smoothly, despite my lack of clamps at home. Next up: sound dampening. For this I bought some foam from McMaster-Carr (PN 5692T15). In hindsight, I probably should've gone with less expensive foam from Amazon or elsewhere. Since I plan on replacing these in the future, I needed a way to fasten them to the wood in a removable way, and decided on 3D printed umbrella-shaped plugs. Each orange plug gets an M4 heat-set threaded insert (McMaster PN 94180A353) so it can be tightened against the wood. I love using heat-set threaded inserts for adding threads to 3D printed parts, as they're easy to install with any soldering iron:
I cut all the foam pieces down with a knife and used four or five of my printed umbrella things to hold them in place. Early tests of running the mill inside the box were not inspiring, but the door really made all the difference. I couldn’t fit it on the original 4x8 sheet but cut it out later on, using similar techniques. I left a window area, which I later filled with some tablesaw-cut polycarbonate. With some hot glue to hold the window in place and two hinges to allow the door to swing, I was ready for another test!
I milled a portion of the aluminum base part for my Spinlock mechanism once the door was installed and was impressed by how much the sound was dampened. I later add two simple sheet metal parts and a band to keep the door closed, and am fairly happy with the results so far!
You may notice that the mill seems to be sitting very low in the box, or one of two already-installed drawer slides, in the above photos. The eventual goal is to create a bent sheet metal platform, on which the mill will rest and slide in and out of the box on the drawer slides.
So, that brings us to the list of improvements for Part 2:
Add the aforementioned sheet metal platform for the mill to sit on.
Once the platform is in place, I’ll need to drill a hole in the right side and create some sort of plunger so I can still hit the E-stop from the outside of the box.
The bottom two compartments are filled with junk now, so they’ll need some organizing. I’m thinking of trying some base-mounted drawer slides, which I’ve never used before.
Stay tuned for more!


